I embarked on my first attempt at multi-stage underwater environment and material creation.
From the original concept to optimized environment in Unreal, character sculpting, foliage, designer materials, lighting functions and material functions, every asset was crafted entirely from scratch.
Concept
Concept with Mattepainting by me
Unreal blockout and paintover to establish the 2nd concept
BALOR – I Daub These Caverns, For Your Next Millennium
Set within the depths of a Mediterranean abyss, the project draws inspiration from Celtic mythology, unfolding within an underwater palace. A lone woman surrounded by reliefs with Celtic motifs, corals, and bioluminescent creatures that breathe life into the palace.
In the first scene, the palace is a sanctuary untouched by time. But in the second, devastation strikes—Balor, the one-eyed giant of Celtic legend, emerges. His singular eye, vast enough to dwarf the palace itself, shatters the cliffs above, casting his gaze upon the cave. In an instant, time accelerates unnaturally—centuries collapse into moments. The once-thriving corals wither and die, the palace crumbles into ruin.
Yet, the woman does not waver. Raising a single hand, she unleashes her greatest power, though part of the palace succumbs flow of time, the portion within her protection remains untouched.
I want to depict a battle between destruction and defiance, between the relentless passage of time and an unyielding will to endure.
The title itself embodies her unbreakable resolve:
"I have driven you back, but I know you will return. You have razed my palace today, and perhaps you will again. Yet still, I paint my caverns in brilliant hues. I fear nothing. I am ready for your next millennium—just as I shall be for the next."
Title has drawn inspiration from the poem Swoon, by American poet Kim Addonizio.
Starting the journey with material creation, I first browsed through the material artist posts on 80 level and Artstation. Ben Wilson and Daniel Thiger’s tutorials helped me a lot.
The use of multiple subgraphs to make different components and then using a random seed to procedurally create a random pattern is a game changer. For instance, in the creation of water erosion material, I manually created three levels of erosion and blended them using height blend, so adjusting each hole procedurally is impossible.
However, in my Gigantic Eye, mineral deposit, and Oculina's bleaching effect, I created a pattern using a subgraph. I adjusted each randomized pattern separately, and combined them using one or multiple tile samplers/shape splatter.
Material Breakdown
To create visually distinct holes on the surface, I referred to Daniel Thiger's hazelnut ice cream tutorial, which explains how to generate nuts of varying sizes while maintaining clear, defined shapes. I then reversed the method I had learned, adapting it to form unique holes instead.
RELIEF
For the reliefs that take up a significant portion of the scene, I referenced the Elgin Marbles, Nereid Monument, Pergamon Altar, and Trajan's Column, and ultimately decided to base my design on the silhouette of the Pergamon Altar. Observing these friezes, I noticed that they are generally divided into three parts: narrative figures, flat surface details that support the storytelling, and decorative patterns at the top.
Following this structure, I designed my material with three distinct decorative elements, which can be swapped using parameters.
After experimenting with various Celtic patterns, I found that Celtic zoomorphic patterns were not suitable for my project. Instead, I chose to use meander patterns. I discovered that Celtic knot patterns follow a simple rule: at every intersection, the lines alternate—one going over, the other going under. By ensuring that every line follows this principle when weaving through others, a cohesive Celtic pattern can be created.
I referred to Nate Stephens' masterclass of procedurally creating details onto existing pattern, and exporting the height map for breaking up the procedurally looking in ZBrush
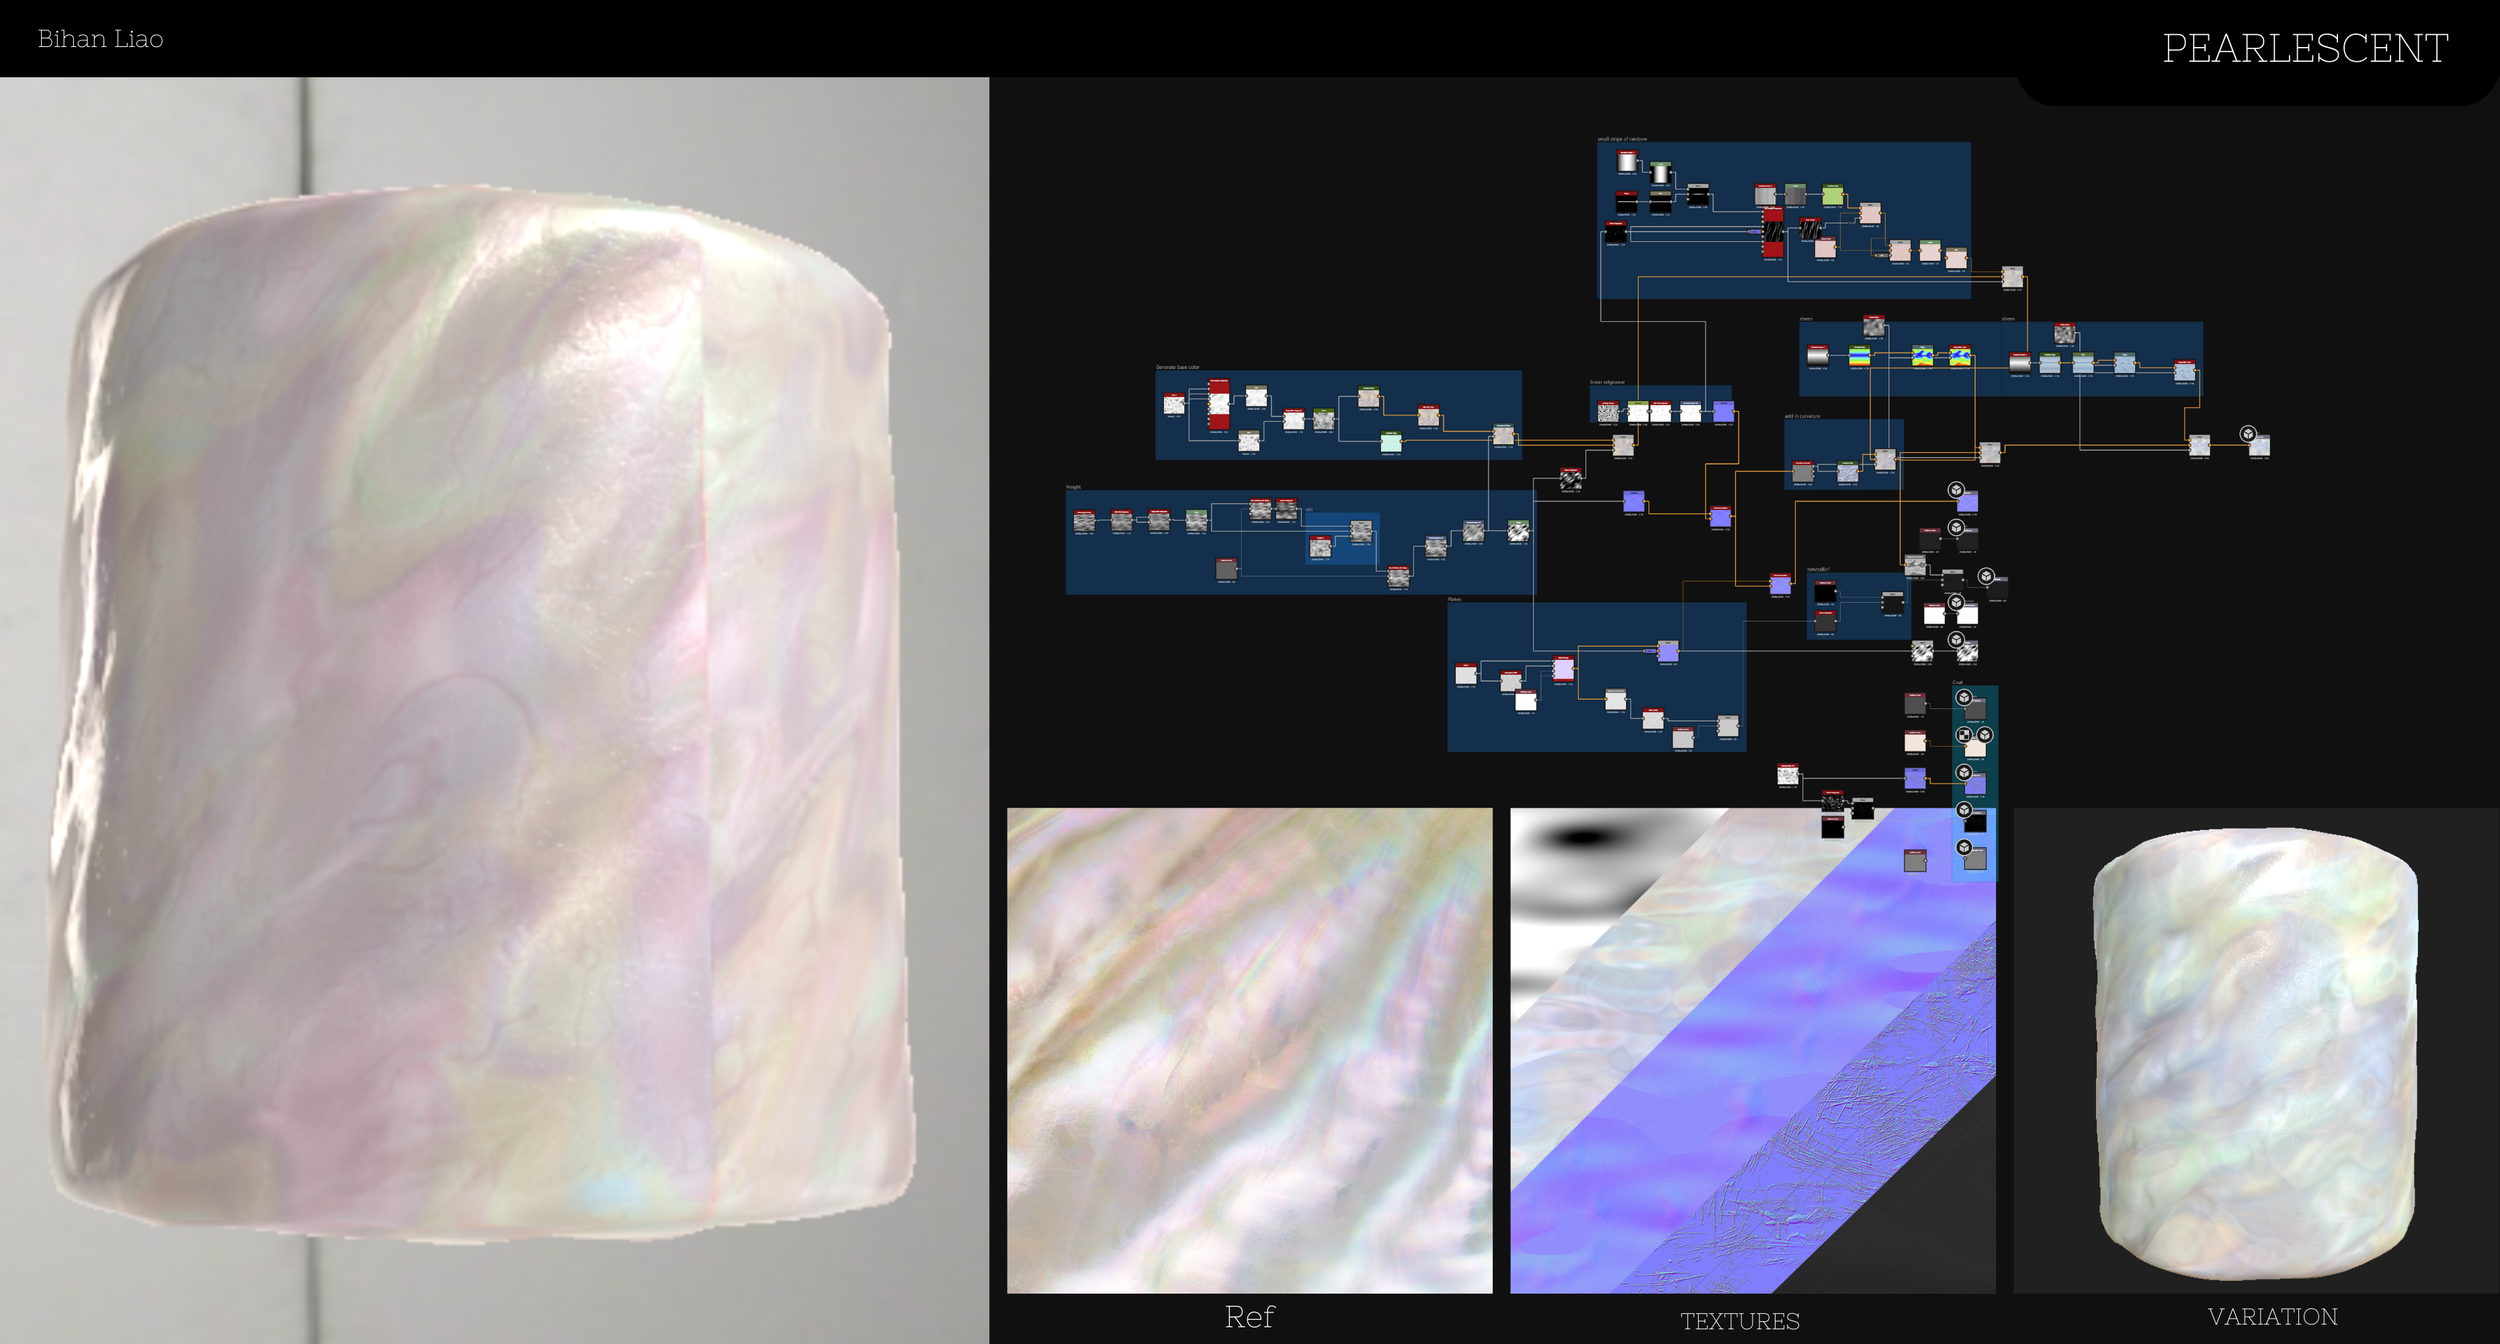
pearl
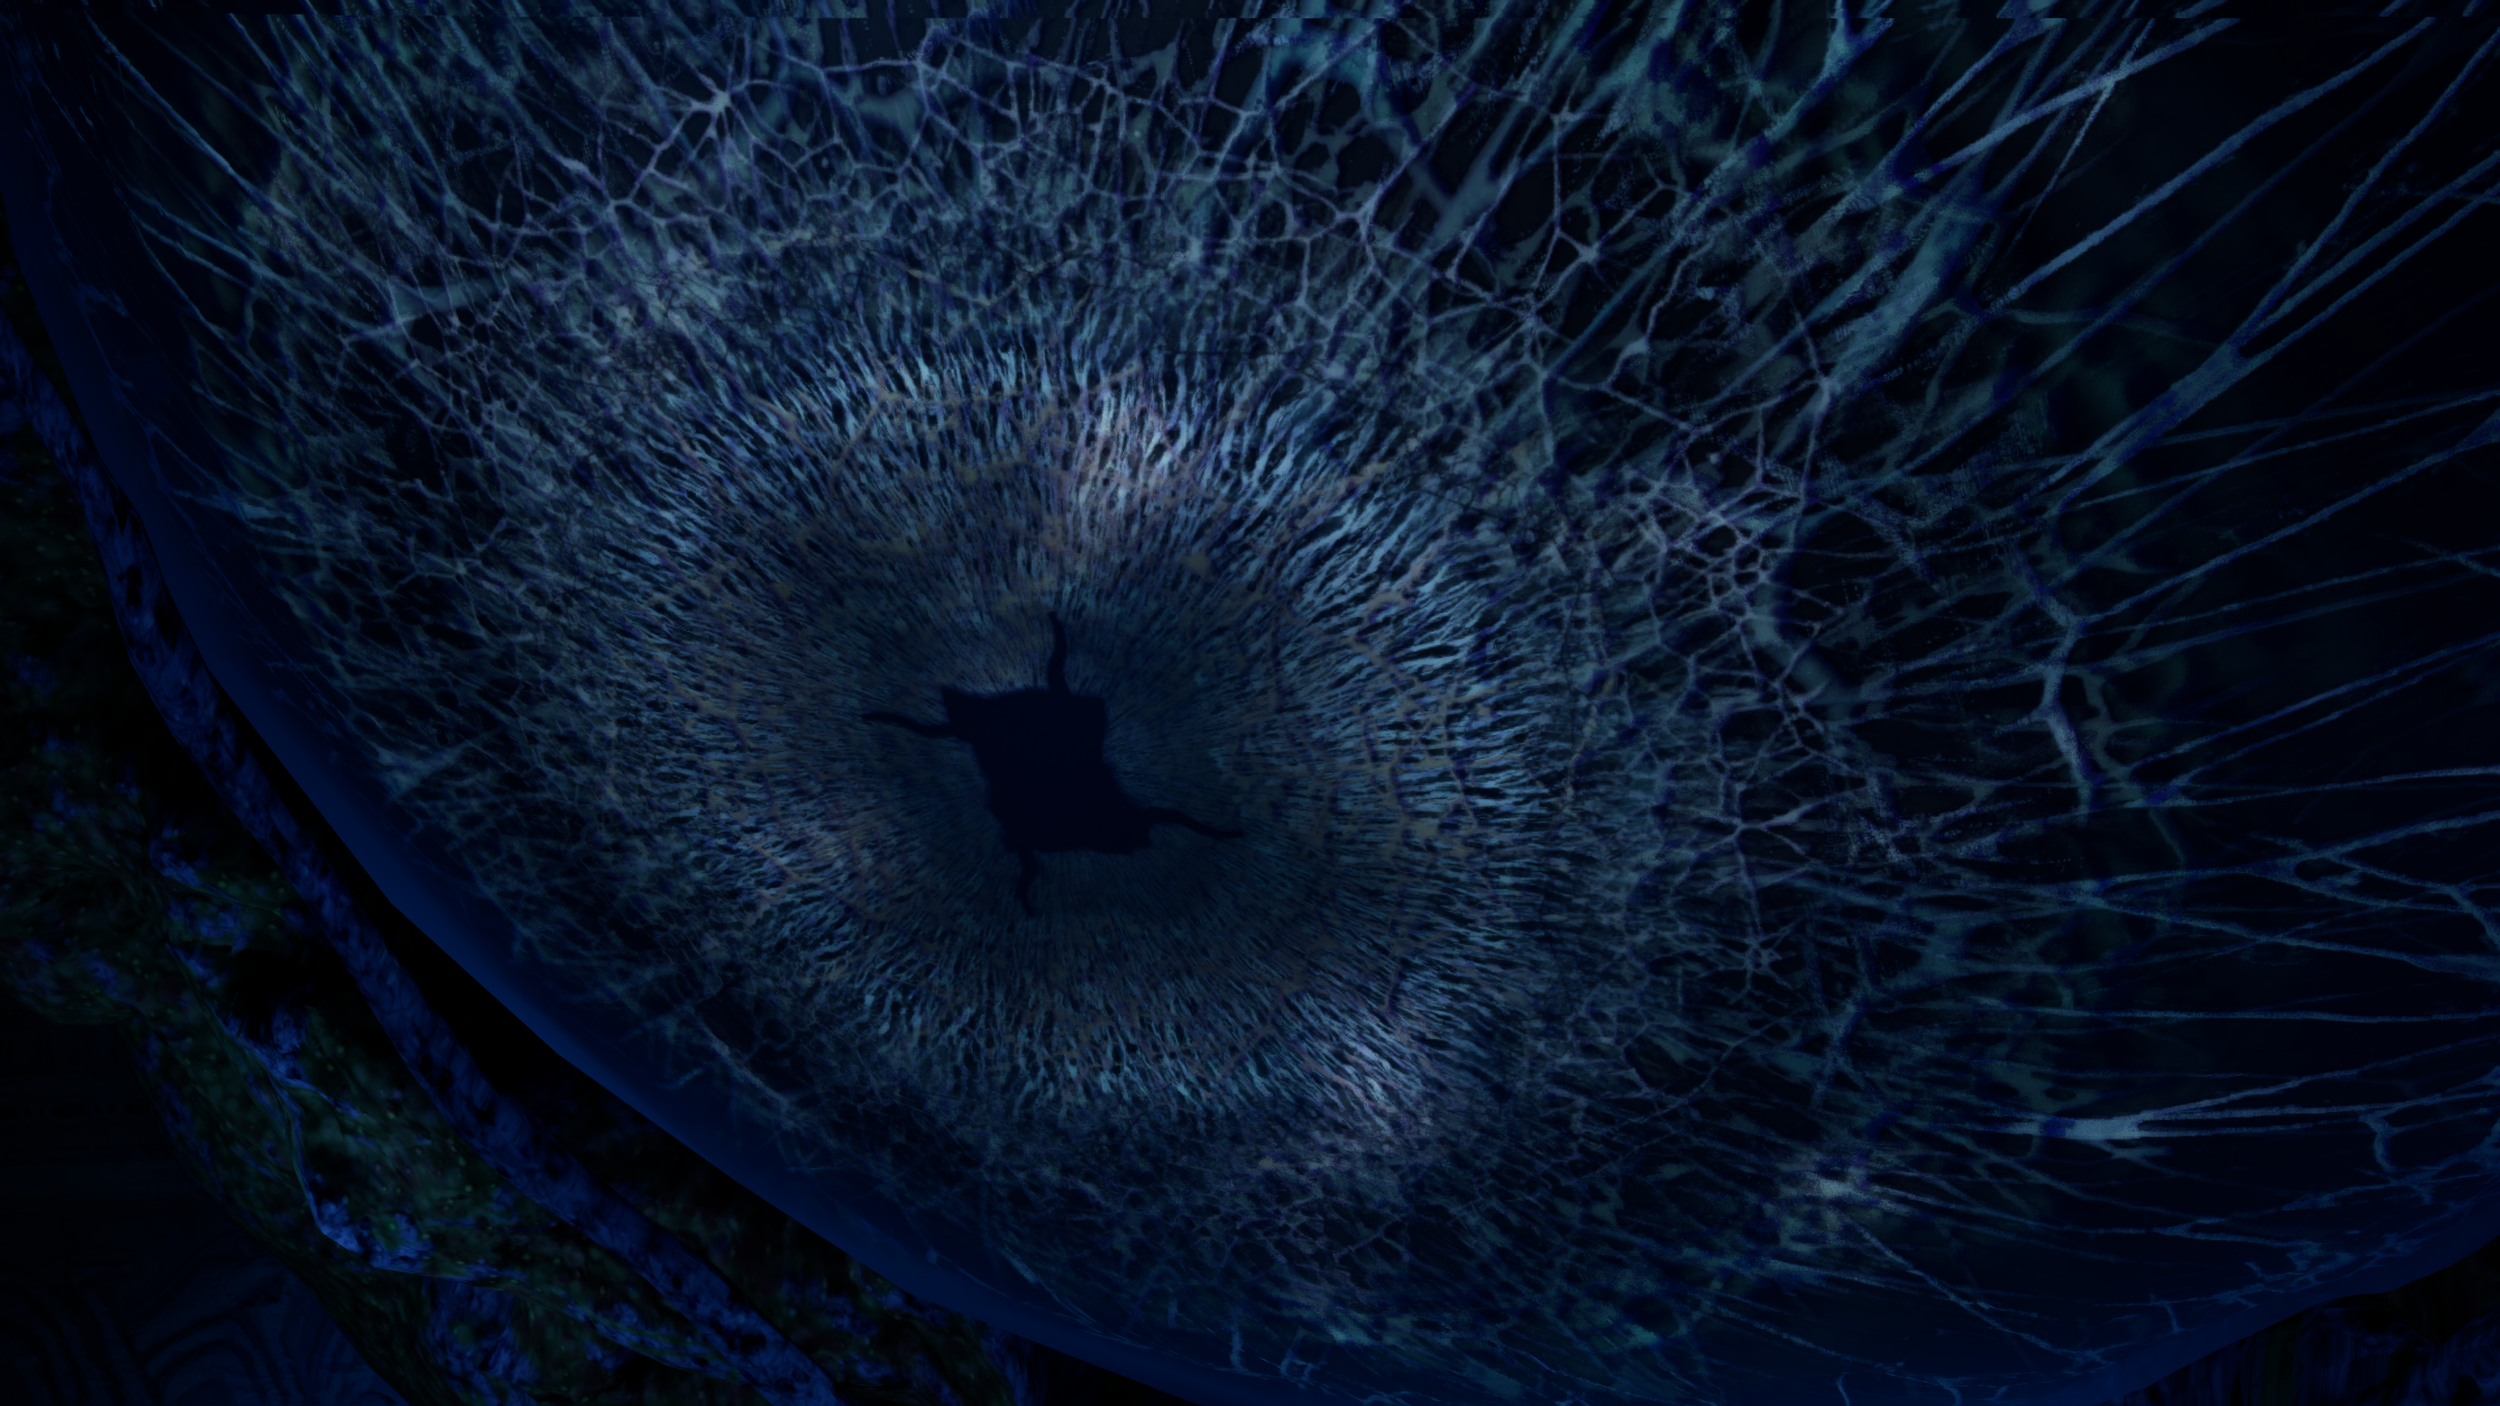
balor’s eye
The outer edges of the iris appear brighter and more translucent, with a soft gradient effect and smoother texture, providing a stark contrast with the denser and more fibrous inner regions. So, I used three Fresnel effects separately to control the eye's emission, outer highlights, and IOR. According to a lecture by material artist and professor Manuel Prada, the IOR transition from the center to the edge of a translucent yet reflective material is crucial. The F0 of IOR can be extremely close to 1.
The SSS profile was used to achieve a blurry and organic effect on the crypts. Though SSS profile is expensive, the eye is my hero asset.
Unreal lacks sufficient control over clearcoat materials, so I added a second translucent layer to the eye, incorporating refraction on top and an additional IOR animation. This approach, in addition to making the pupil appear to contract, also changes how the iris refract, creates the illusion of a realistic tear film on the eye's surface.
Lighting
UNreal Shader
I noticed that while the surface had sufficient height variation, the curvature was still lacking. To improve this, I added gradients with different height levels beneath the patterns and used a switch to control whether they appear on top of other patterns.
For the pearl material, when I was creating it, I was still new to Substance Designer, and there were no available tutorials online on how to achieve pearlescent material in Designer.
Despite being non-metallic, pearls should theoretically reflect light based on their base color (albedo or diffusion). However, pearlescent materials appear to have a layered effect, almost like two materials are stacked together. From this perspective, I found that pearls have a similar visual property to automotive paint.
To replicate this effect in Designer, I introduced a clear coat layer and added scratches and normal details.
While Substance supports layering materials, Unreal Engine only allows adjustments to the opacity of the clear coat layer. Other properties like clear coat roughness, normal, sheen, and anisotropy cannot be directly connected.
I referred to Marcel Souza’s method of creating sheen on shiny clothes and added sheen into pearls’ designer material
Moving forward, since the environment is underwater, I need to add a water erosion effect to each asset. The erosion effect varies depending on the material of the asset. For relief and pearlescent material, it would be water erosion, but for corals, it can be bleaching or bio mineralizatio.n
I tend to pick an iris shape that's interesting in the center, especially uniquely shaped pupils. However, the vertical rectangular pupil reminds me of the Eye of Sauron in The Lord of the Rings.The one with the unusual square-shaped pupil that I finally picked is in fact an eye of a baby King penguin.
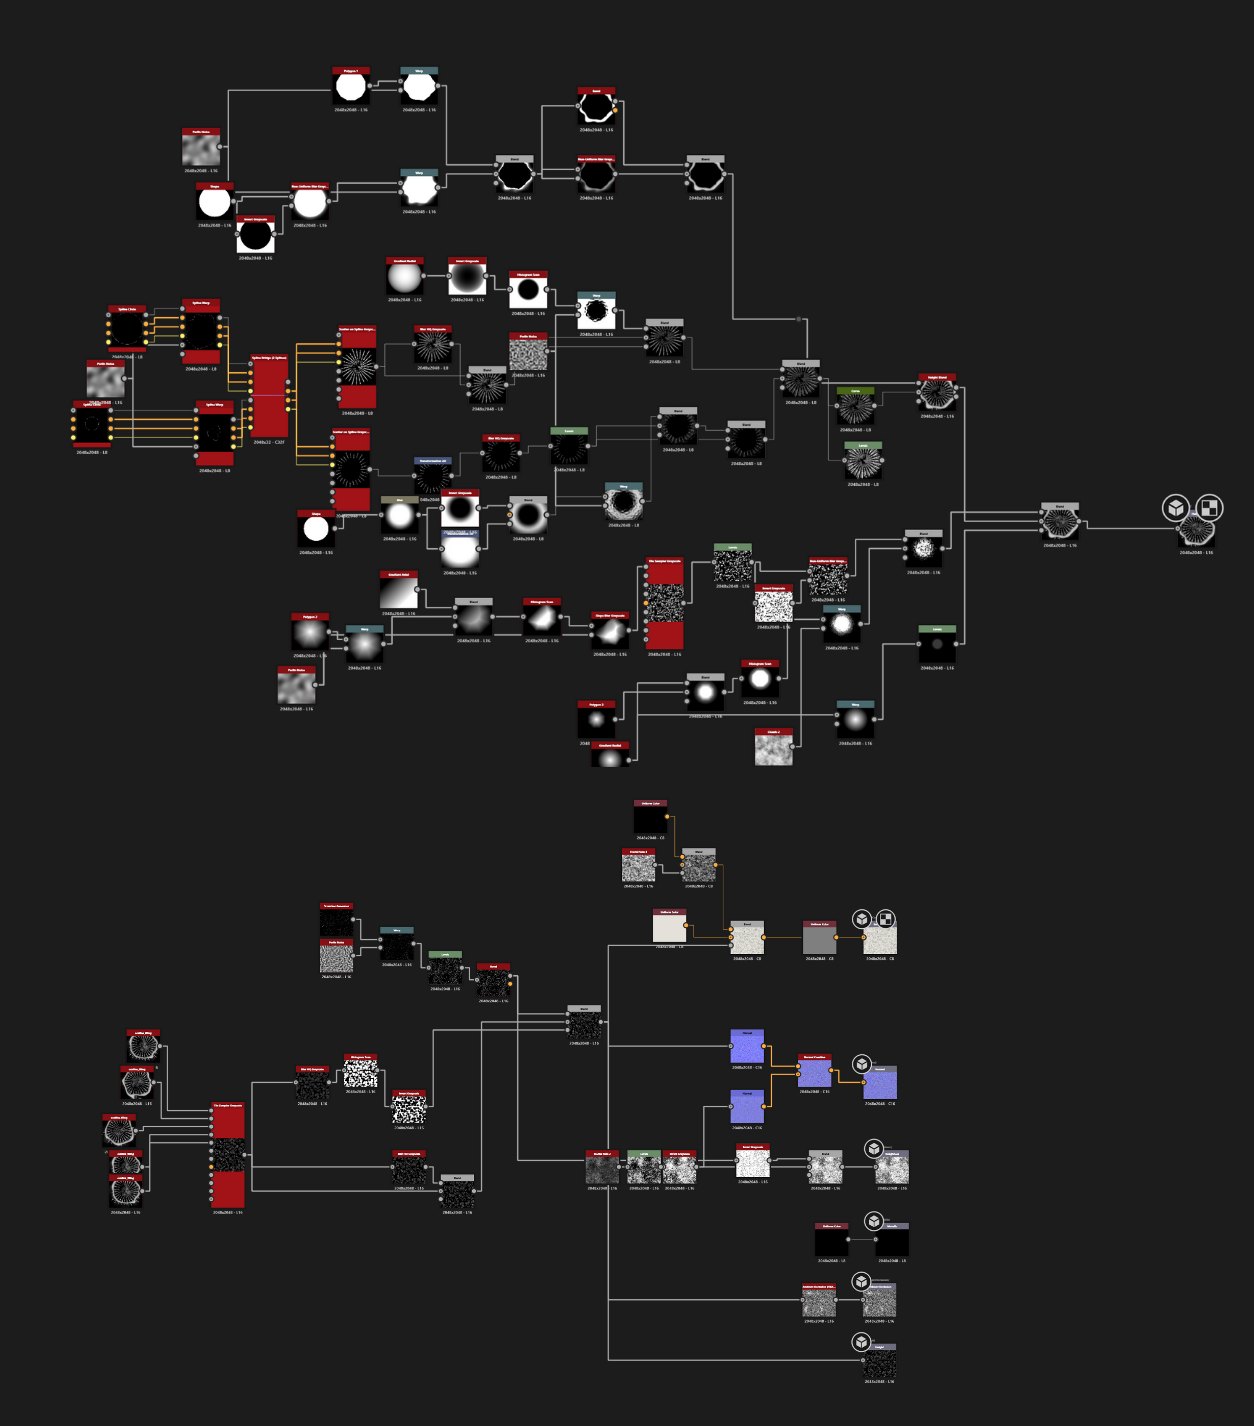
There are generally two ways of making an iris crypt, but I did not choose either. One uses spline bridge and scatter on spline, and the other maps texture radially using Cartesian to polar. The former appears overly procedural even after spline warp, suitable only for small human iris textures, but lacks variation control when creating larger textures. The latter Cartesian method is great but simply mapping one texture radially isn't enough.
In the reference, the varying web-like structures stretch and converge toward the pupil, transitioning into a denser, finer network near the center. The tessellation density between the outer and inner areas differs, yet the overall structure remains interconnected.
I eventually created individual web structures within a subgraph and combined them using a Splatter Circular node, ensuring controlled variation while maintaining randomness.
Jonny node's YouTube channel discussed the Voronoi texture used in the garlic material, which uses masks to map the originally randomly distributed squares before going into the distance node. The masked areas were denser, while the unmasked areas appeared sparser. At first, I tried using a mask in the center, which resulted in a pinched cell noise pattern. However, the resulting detail was insufficient.
Thus, I connected scattered spline bridge to the mask input of a three-tile sampler to achieve better detailed variation.
Even with the spline mask, the Voronoi texture didn't achieve the desired stretching effect, so I had to generate them separately.
The linear textures in the iris crypt are interconnected, and creating them separately would typically result in noticeable seams. However, since some segments from the inner layer extend beneath the outer layers, I can use this overlapping to hide the transitions.
The smaller web in the center has more vertical variation and extends both ways.
I intentionally added many random parameters in the subgraph. After getting the shape, I used the splatter circular node to combine and tweak the randomness while controlling the overall structure.
Throughout the process, I used the same noise and gradient maps as much as possible to optimize performance. According to a post on 80lvl, some noises can be set to smaller resolutions than the main graph, streamlining calculations and eliminating the need for certain blur operations. Saving computation time is essential, especially when tweaking parameters frequently.
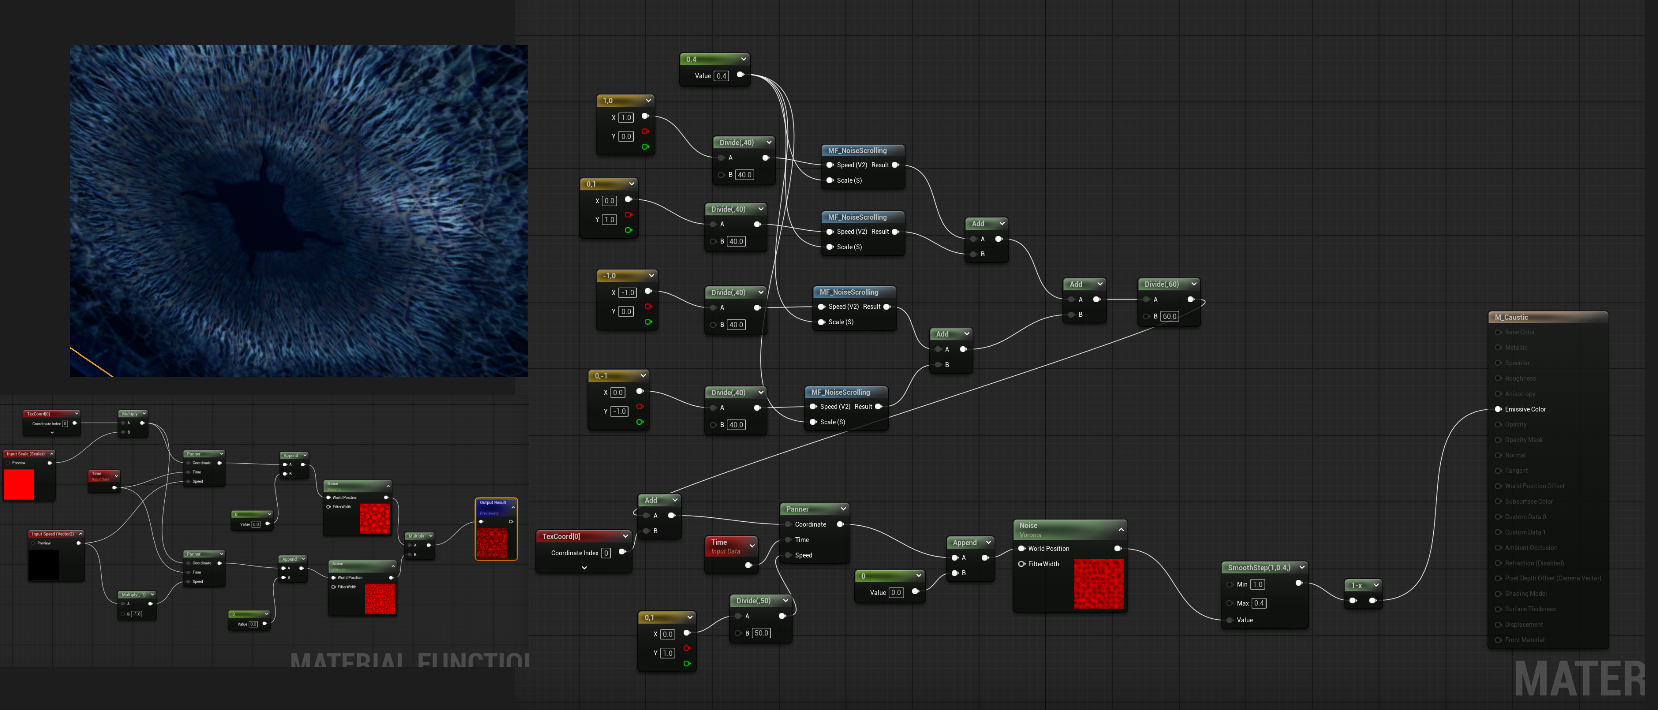
Since the scene is underwater, I wrote a noise scrolling material function, and panned that MF in intersecting directions with multiple scalar parameters to achieve a caustic lighting


